Fedora and Atmel AVR MCUs
 For programming of Atmel AVR microcontrollers I am using JTAGICE mkII USB programmer/debugger. This device is easy to operate from Windows and AVR Studio (4), but the support for Linux is limited from Atmel side. As there is a variety of existing solutions this article is limited to only one of them with ZIGBIT900 running BitCloud ZigBit stack.
However the complete Atmel toolchain is based on GNU GCC (for Windows packed as WinAVR) - thus it is unlimited in functionality and code size. This is a good reason to try this out on Linux. While it is easy to cross compile the source codes to your AVR device, it is not that easy to get the correct programming HW to work. Thanks to Fedora project there is a complete toolchain for you to program and debug the devices.
First you need to install the tools:
yum install avr-binutils avr-gcc avr-gdb avrdude avarice \
avr-libc ddd binutils-static uisp ddd
This should make you ready to you first "hello world", or better in MCU world first "blink".
I will demonstrate that on Atmels BitCloud stack (ZigBee implementation called ZigBit) and its example "Blink". The only disadvantage is this stack is provided only as a library, there is no source code for it. Generally you do not need it for your application, so this is OK.
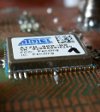
As a device I am using MCU Atmel ATmega1281V + transciever AT86RF212 operating in 868MHz ISM band. This combination of devices is possible to buy as a ZigBit900 module. You need to build your own PCB for that in this case, or you can buy it as MeshBean board development kit from Atmel (those were originaly developed by Meshnetics).
Building the Blink example
First download the BitCloud stack for ZigBit900 from Atmels site (you need to go thru brief registration). While this stack is bit overhead for just a blink application, this is just somethink that has to get you started.
When you are done downloading, just unpack it and go to the subdirectory with "Sample Applications/Blink", open Configuration file with your favorit editor and set up the board to MESHBEAN_BOARD. If you are thinking about where do I got this value, the you need to go deeper into the stack to understand it. Generally the stack is divided into several parts like BSP (description of various additional sensors, buttons and leds on the board), HAL (hardware abstraction of the main MCU), ZDO (ZigBit Data Objects - implementation od the ZigBee itself) etc. You will find description in documentation. Various types of the boards you will find under BSP BoardConfig. You can setup also other options in the example Configuration. Then everything is as simple as typing:
make
Compiling the app to a .bin, .hex etc. Then you need to transfer the binary stream into the flash of your MCU.
Programming the MCU
Connect the JTAGICE mkII with your PC thru USB and power it on. You should see something like this
usb 2-8: new full speed USB device using ohci_hcd and address 2
usb 2-8: New USB device found, idVendor=03eb, idProduct=2103
usb 2-8: New USB device strings: Mfr=1, Product=2, SerialNumber=3
usb 2-8: Product: JTAGICE mkII
usb 2-8: Manufacturer: ATMEL
usb 2-8: SerialNumber: 070000004D7C
usb 2-8: USB disconnect, address 2
usb 2-8: new full speed USB device using ohci_hcd and address 3
usb 2-8: New USB device found, idVendor=03eb, idProduct=2103
usb 2-8: New USB device strings: Mfr=1, Product=2, SerialNumber=3
usb 2-8: Product: JTAGICE mkII
usb 2-8: Manufacturer: ATMEL
usb 2-8: SerialNumber: 070000004D7C
usb 2-8: USB disconnect, address 3
Connect your device to programmer thru JTAG and invoke the avarice programming utility:
avarice --erase --program --file blink.bin --jtag usb --mkII

AVaRICE version 2.10, Jun 22 2010 15:23:26

Defaulting JTAG bitrate to 250 kHz.

JTAG config starting.
Found a device: JTAGICEmkII
Serial number:  07:00:00:00:4d:8c
Reported JTAG device ID: 0x9704
Configured for device ID: 0x9704 atmega1281
JTAG config complete.
Erasing program memory.
Erase complete.
Preparing the target device for On Chip Debugging.

Disabling lock bits:
  LockBits -> 0xff

Enabling on-chip debugging:
  Extended Fuse byte -> 0xff
      High Fuse byte -> 0x1c
       Low Fuse byte -> 0x62
Warning: File format unknown, assuming binary.
Downloading FLASH image to target........................

Download complete.
Reset the unit and you are done.
NOTE: On F13 you need to use avarice-2.10-4 - at the moment it is in updates-testing. You need to be a root to access the USB and program the device.
If you wanna use a real time debugging feature of the JTAGICE, you can let the avarice run as a deamon
avarice --jtag usb --mkII :4242
create gdb.conf with
file blink.elf
target remote localhost:4242
and start
avr-gdb -x gdb.conf
or
ddd --debugger "avr-gdb -x gdb.conf"
However you may run into many problems here - 1. you do not have a sources of some functions using stacks, 2. avr-gdb is crashing etc. Crashes were caused by incorrect avr-gdb version in Fedora, which is now fixed.
With avr-gdb you may try:
break APL_TaskHandler
cont
break blinkTimerFired
cont
you have to be very carefull debugging this kind of code, because most of the time, code is running in the stack without source, it only hands over to your code at certain events.
Good Luck.
